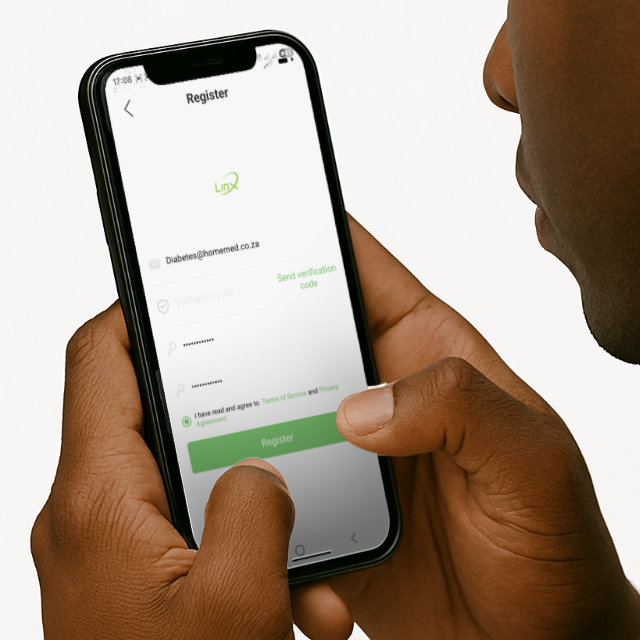
- Use your email address to register an account and create a password.
- Password requirements: minimum 8 characters, including a capital letter, small letter, number, and special character.
- Check your email for the verification code and log in.
- Once logged in, select the unit of measure as mmol/L, allow all permissions, and follow the app prompts.
- Note: You may only log in to your account on one mobile device at a time.
Get started with your LinX CGM
in 4 easy steps
1 Download the LinX CGM App
Not sure if your mobile device is compatible? Contact us at diabetes@homemed.co.za
For Android devices, click on the link or scan the relevant QR code to download the LinX CGM App onto your device.
Google Play Store Scan the code below to
download the LinX CGM app:
download the LinX CGM app:
For Apple iOS devices, click on the link or scan the relevant QR code to download the LinX CGM App onto your device.
Apple App Store Scan the code below to
download the LinX CGM app:
download the LinX CGM app:

To install the LinX CGM app on Huawei devices, you will need the GBox app.
To download GBox on a Huawei device, you can either find it in the Huawei AppGallery or download it from the official GBox website. GBox allows you to install and use Google apps on Huawei devices that don't natively support them.
Here's a breakdown of the process:
Downloading from AppGallery
- Open the Huawei AppGallery on your Huawei device.
- Search for "GBox".
- Select GBox and tap "Install".
- Open GBox and agree to the user agreement and privacy policy.
- You may need to install the Google Play Store within GBox, or it might already be installed.
- Sign in to the Google Play Store with your Google account.
- You can now download Google apps through the GBox instance of the Google Play Store, according to the Huawei community.
- For more information, visit the official GBox website: gboxlab.com on your Huawei device's browser.
Important Notes:
- GBox provides a way to access Google apps on Huawei devices that lack native Google Mobile Services (GMS) support.
- GBox is safe to use as it is verified by Huawei AppGallery.
- You may need to grant permissions to GBox to allow it to function correctly.
- Keep GBox updated to the latest version for optimal performance and to avoid issues.
2 Register an Account
3 Apply the Sensor
The sensor is located inside the sensor applicator. Follow the instructions to prepare and insert the sensor on the abdomen (age 2-17 years) or the back of the upper arm (age ≥18 years). The sensor has a small, flexible tip that is inserted just under the skin. The sensor can be worn for up to 15 days.
Step 1:
Open the package and select Insertion Area
The abdomen is the recommended insertion site
Avoid inserting the sensor around the navel, scars, subcutaneous induration and the waistband.
Open the package and select Insertion Area
The back of the upper arm (between the arm pit and elbow) is the recommended insertion site
- Ensure there is enough fatty tissue to avoid inserting into the muscle
- Shave the area if necessary
Avoid inserting the sensor into the muscles on the outer side of the upper arm, areas with loose skin, where the sensor may get bumped or under pressure (e.g. while sleeping), within 7.5 cm of an insulin pump infusion set or injection site, or near skin irritations, scarring, tattoos, or moles.
Ages 18 years and older 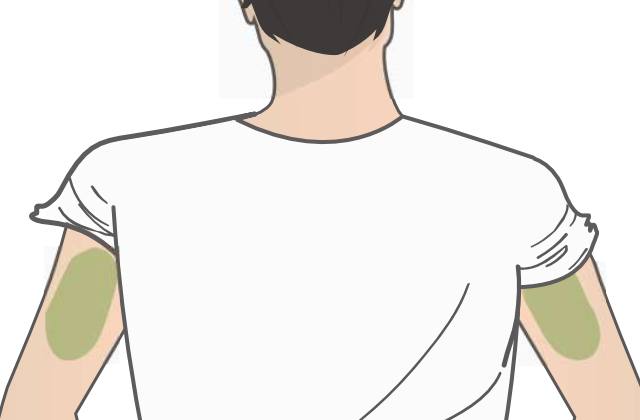 Back of the upper arm
Back of the upper arm Ages 2-17 years 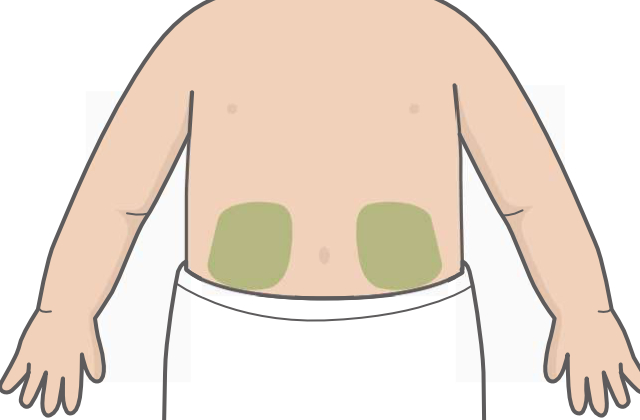 Abdomen
Abdomen Step 2:
Disinfect the insertion site with an alcohol wipe and allow it to air dry completely.
Ages 18 years and older 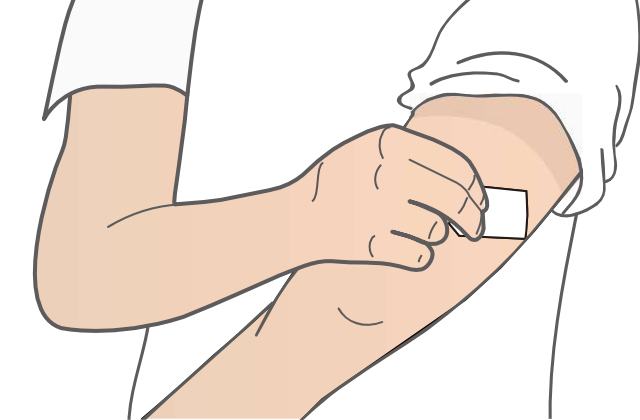 Back of the upper arm
Back of the upper arm Ages 2-17 years 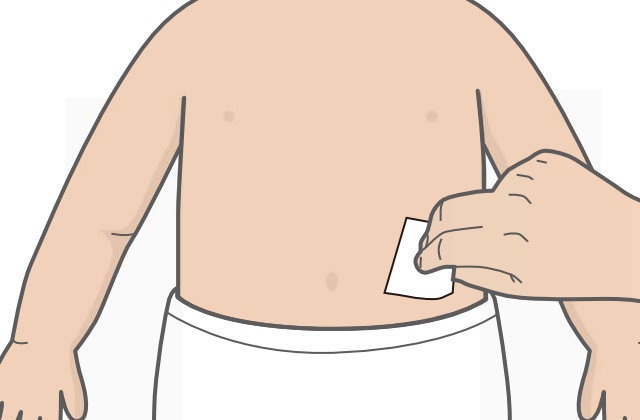 Abdomen
Abdomen Step 3:
Unscrew the cover of the applicator and set it aside.
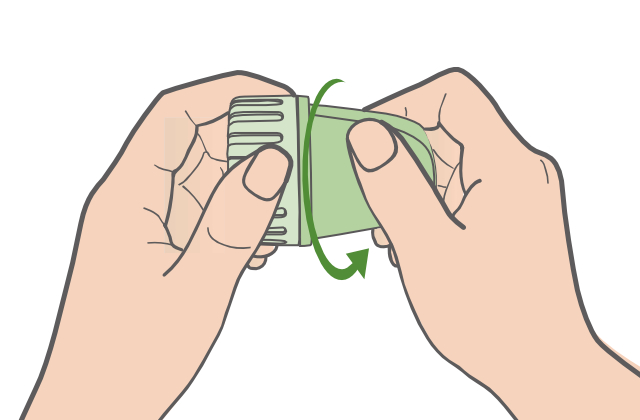
Step 4:
To insert the sensor, firmly hold the applicator flat against the insertion site and press the white button until you hear a click. The insertion needle will automatically retract into the applicator.
Ages 18 years and older 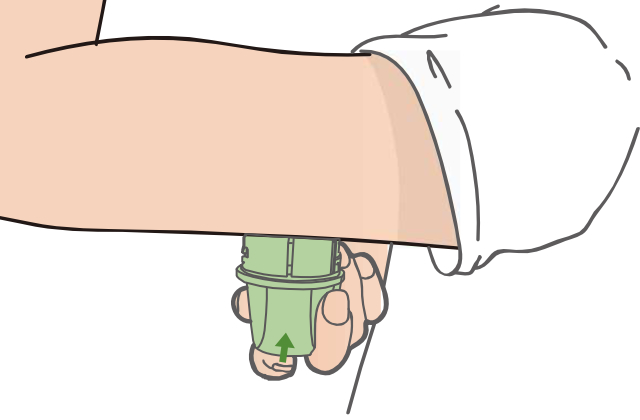 Back of the upper arm
Back of the upper arm Ages 2-17 years 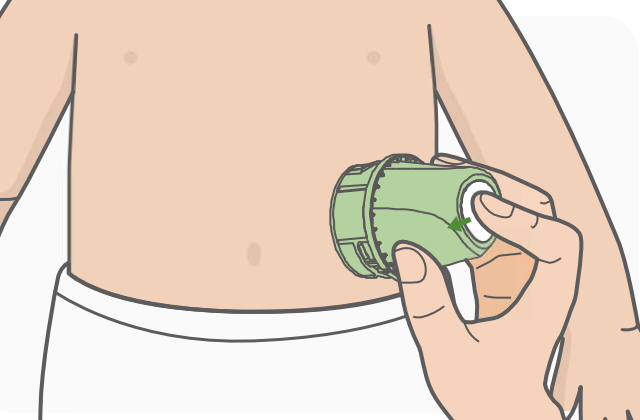 Abdomen
Abdomen Step 5:
Gently pull the applicator away from the body, and the sensor should now be attached to the skin.
Ages 18 years and older 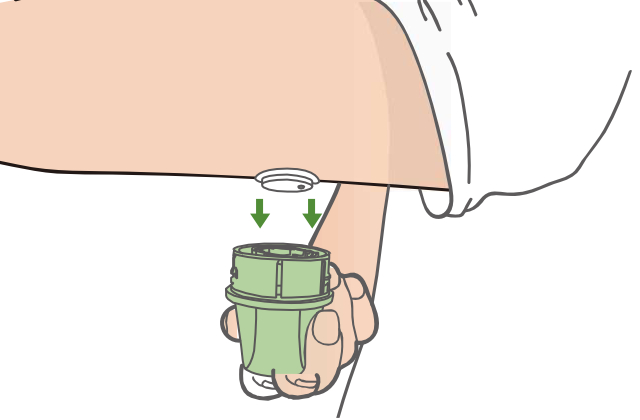 Back of the upper arm
Back of the upper arm Ages 2-17 years 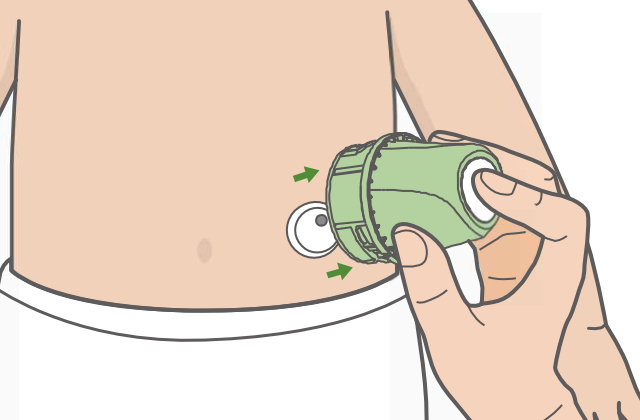 Abdomen
Abdomen Step 6:
After inserting the sensor, make sure that the sensor is firmly in place by using your fingers to flatten the edge of the adhesive.
Ages 18 years and older 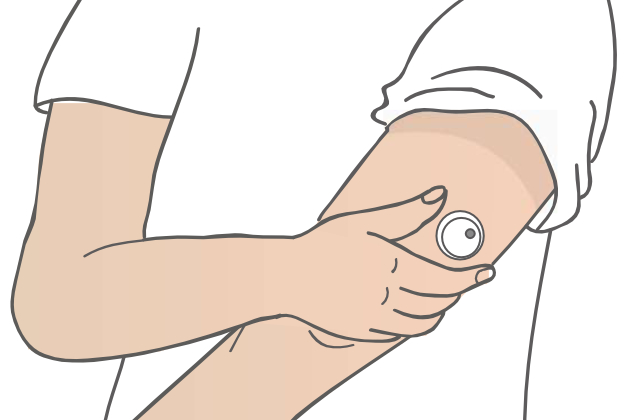 Back of the upper arm
Back of the upper arm Ages 2-17 years 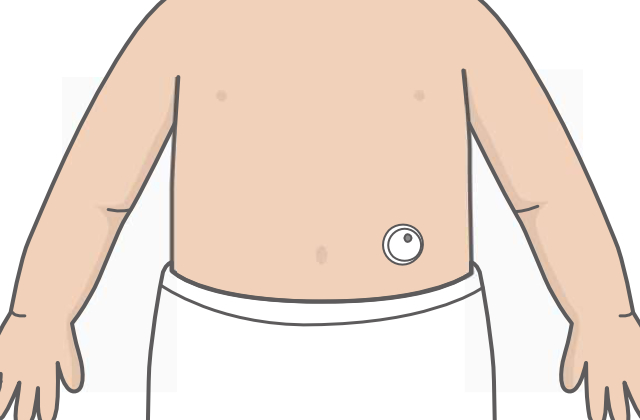 Abdomen
Abdomen 4 Pair Sensor
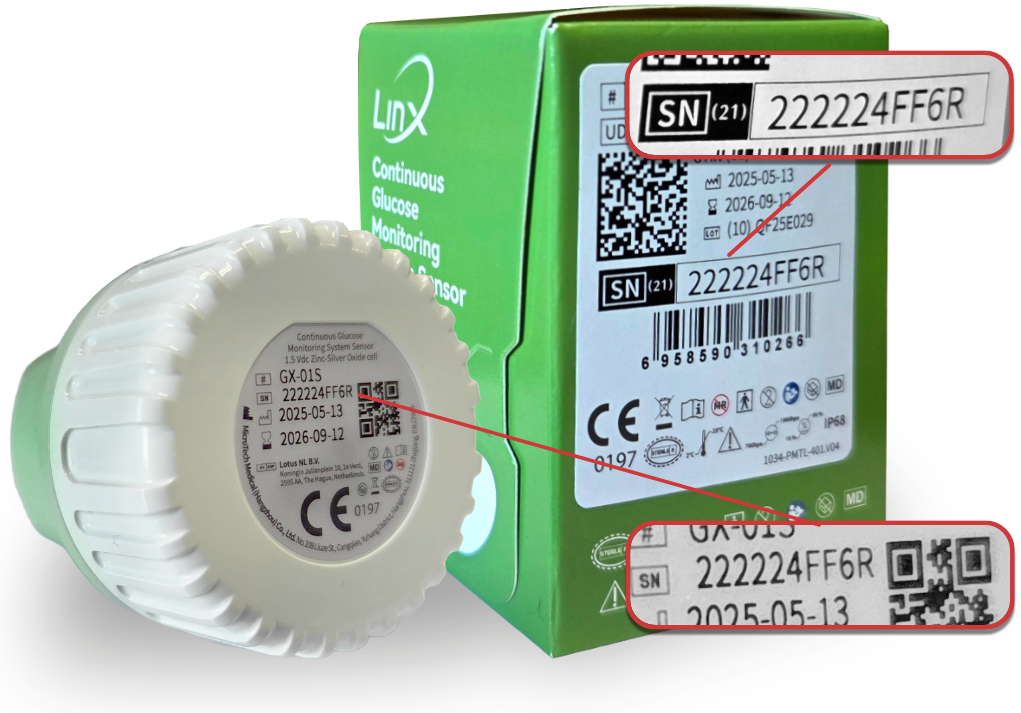

- Once inserted, follow the prompt on the app home screen to pair the sensor.
- The serial number is located on the applicator cover and the sensor packaging box.
- After pairing, the sensor will warm up for 60 minutes and then begin recording glucose readings in the app.